How Can We Help?
You can adjust the date and time on HEAL UI using the controls at the top right section of every screen. Screens display details with respect to the selected date and time. A change in the selection of the date-time range updates the details accordingly.
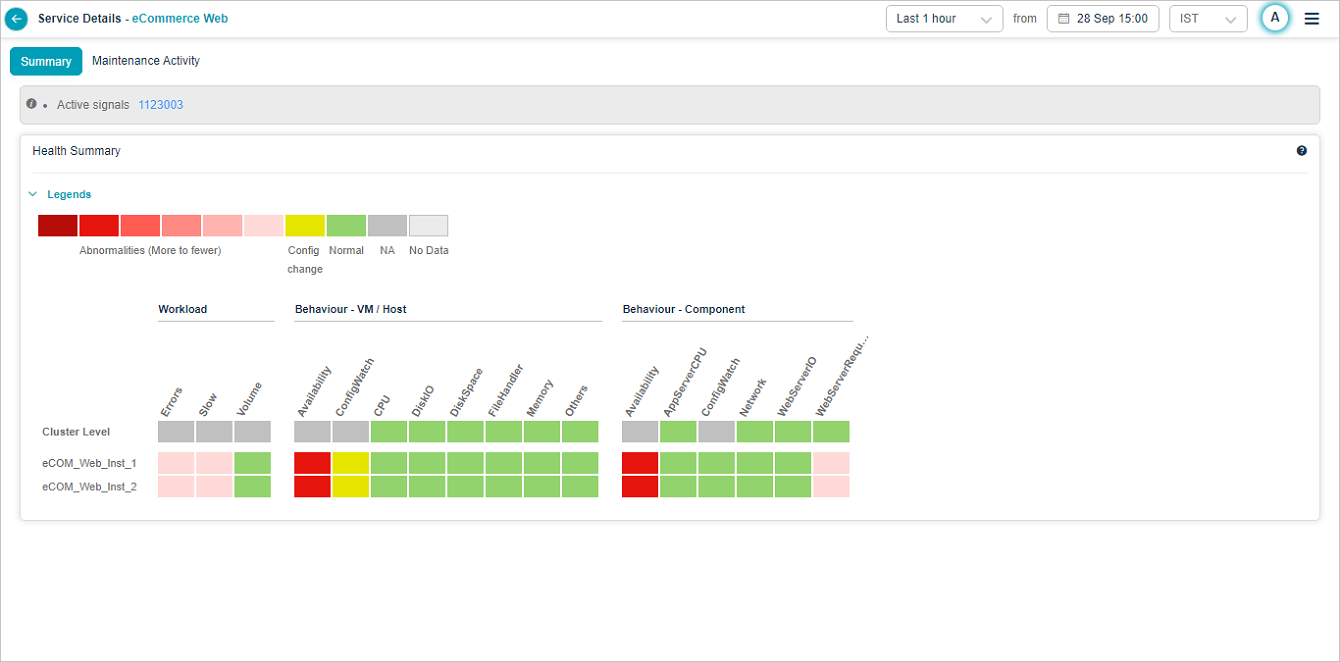
Service Details_Summary
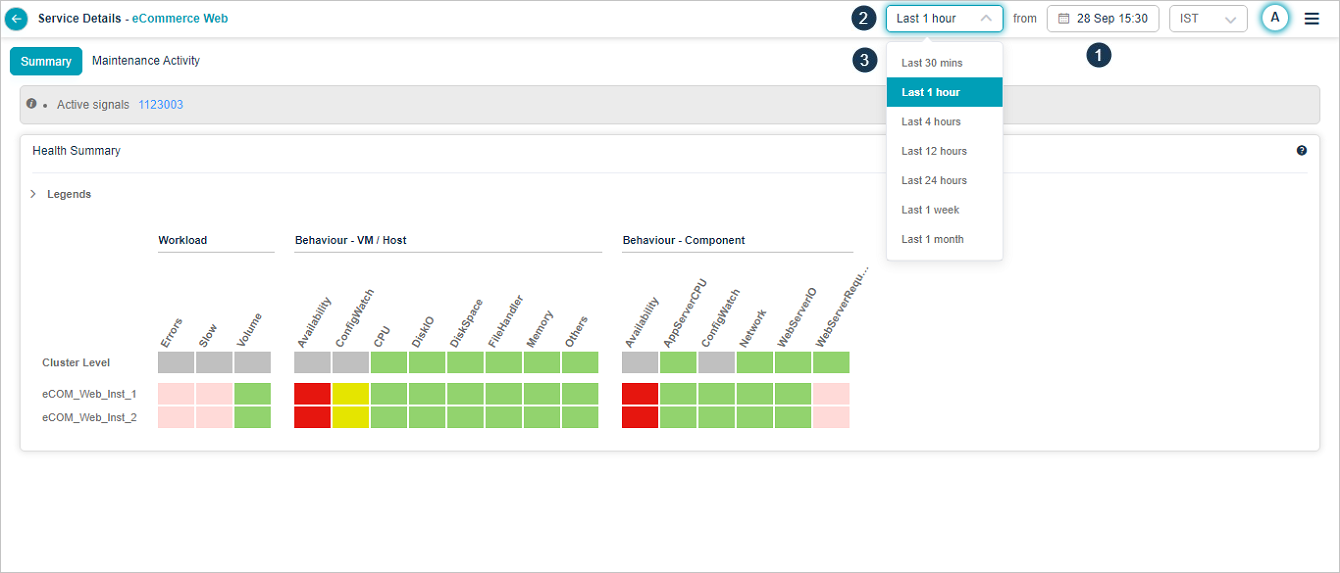
Setting Duration
1 | By default, the current date and time are displayed on the top right corner of the HEAL UI. Select this control to adjust the same. It displays screen 4. |
2 | Select this drop-down to select service details for a particular duration. |
3 | Select the Service details for the last 30 minutes/1 hour/4 hours/12 hours/24 hours/1 week/1 month from the drop-down. |
Select the timestamp box to change the date and time.
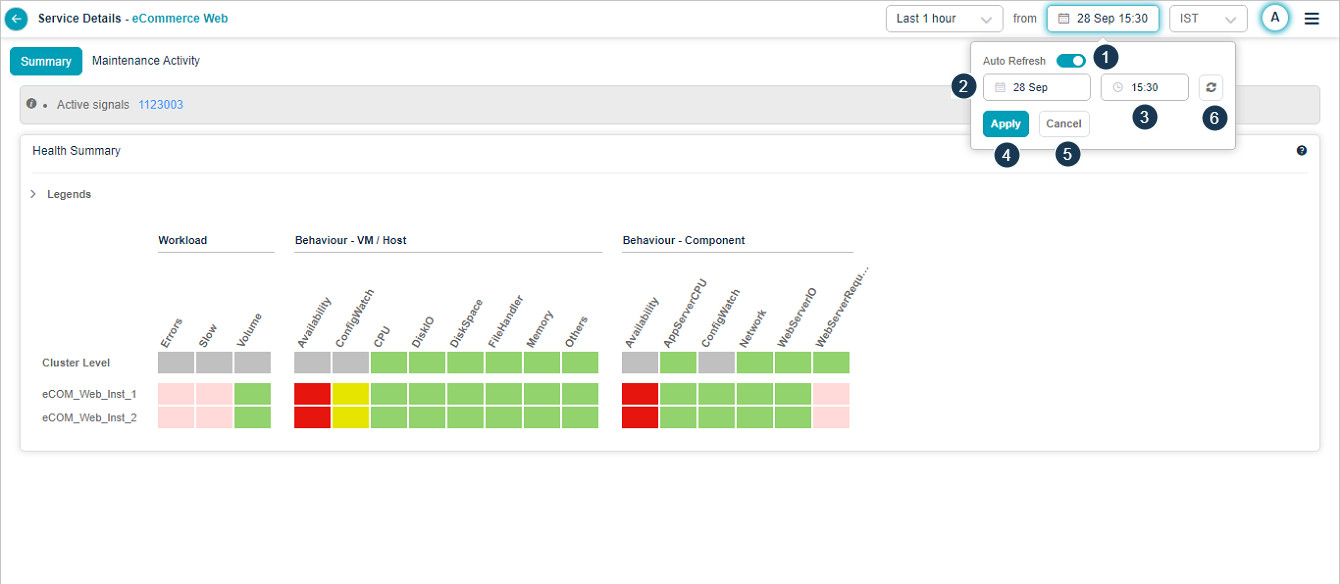
Setting Duration
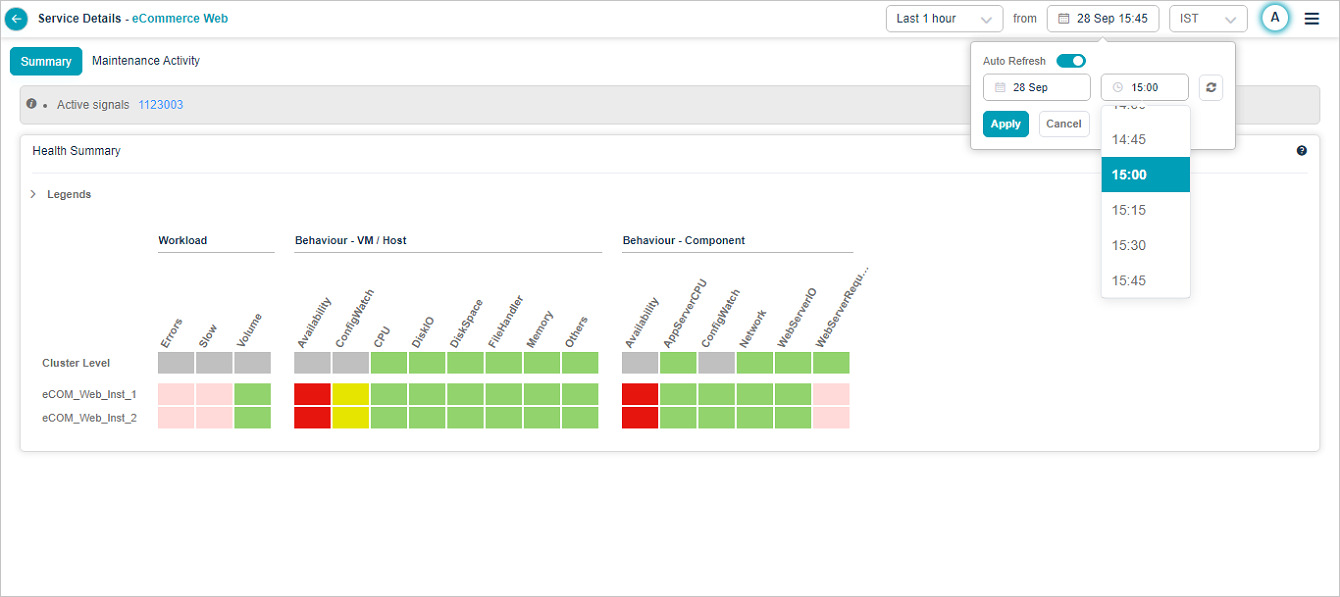
1 | Turn ON Auto Refresh to refresh the details on the screen automatically after a particular time interval. The time interval for auto-refresh is configurable. If auto-refresh is Off, you need to manually change the time in order to display data corresponding to that time. |
2 | Select this box to set the required date. It displays a calendar. |
3 | Select this box to change the time. |
4 | Select OK to set the selected date and time. |
5 | Select Cancel to discard the date and time changes. |
6 | Select this icon to reset the date and time to the current. |
Select the required date from the calendar.
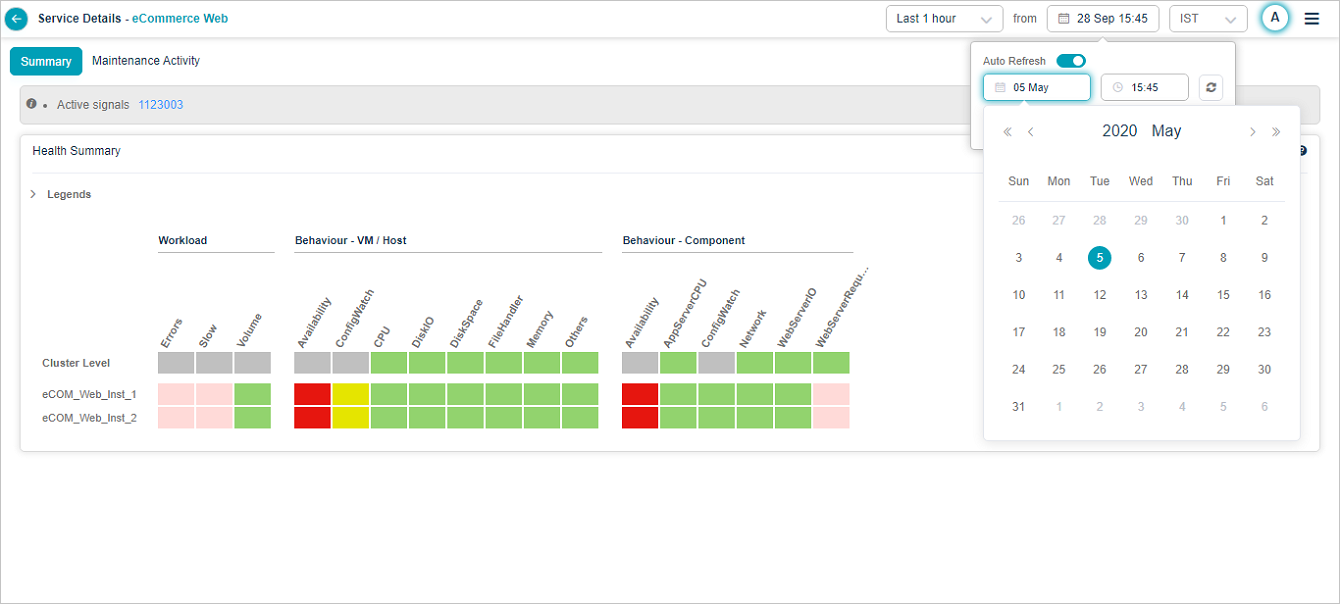
Setting Duration
Select the time from the drop-down (multiples of 15-minute intervals and in 24-hour clock format).
Setting Duration